Search This Blog

Thursday, November 29, 2012

DIY Curtains From Store Panels

I looked all over for curtains that I liked. We are on a budget, so my choices were limited. I looked at every fabric store in town, I looked online...I could not find anything I liked. I wanted long curtains because we have high ceilings, and long curtains and a small budget don't really work well together. Also, because we are renters, we didn't paint the walls. Which means our color scheme is limited, and I couldn't find the patterns that I liked. After hearing Van ask for curtains for literally 3 months, I decided to just make something to get us by. We went to Walmart and bought 3 panels. Two ivory panels and one green panel. The goal: DIY Color blocked curtains. Here is how I made them.

I took my two ivory panels and set them aside, then took my green panel and folded it in half "hamburger style". Anyone remember that from Elementary School? After I folded it, I cut along the line to make it 2 pieces. 


Next, you take both pieces and lay them on a flat surface, the front/outside of the curtain face down. 

Bentley thought this was a nice little place to lay down.

Your next step is to pin the two pieces together:

Make sure you line them up and pin straight. Also, make sure you have the outside layer facing down on both sides. Don't be like me and sew half of the panel together before you realize you did it wrong. I am as newbie as it gets at sewing and this has been a major trial and error process for me. Note that I also did not let out the hems on the original curtains. For me it didn't matter, to others it might. I bought back tab panels so that all sides had finished ends.

...Just keep pinning, pinning, pinning....


Moral support from Nova, who looks like hes falling asleep from boredom. 
When you are finished pinning, it should look a little something like this:


Next, SEWING!


One lesson I have learned is to go S L O W.
Do your best to keep your line straight.

When you are finished sewing the 2 pieces together, it should look a little something like this:


Here is the finished product hanging in our living room. Because of the layout of our living room, the couch has to be directly in front of them so you can't see the color blocking. But now Van has curtains, and they are long enough for my liking. They will do for now! 


Give it a try! It wasn't difficult and took me a total of 30 minutes. The cost of all of the panels at Walmart was only $45!! Can't beat that.


Tuesday, November 27, 2012

Thanksgiving....ROUND 3!

I know Thanksgiving was almost a week ago at this point, but it is one of my favorite Holidays. Reason number one-FOOD. This year I heard from numerous people that we should try a fried turkey. Now, Van and I have this thing we call "Deep Fry Night". Basically we make way too much fried food, feast, then feel really bad about ourselves after. So basically frying a Turkey was right up our alley. Van and I don't really have any Holiday traditions, so we thought that we would start one and have our own Thanksgiving meal together the weekend after-and we wanted to deep fry a turkey. IT WAS THE BEST TURKEY EVER!! Here is how we did it:

You will need-
Turkey Breast (we bought a 2lb breast)
McCormick Seasoning (Flavor of your choice, we used Garlic and Herb)
Flour
1 Egg
Milk
Peanut Oil for frying

Step One:
Mix your seasoning and flour at a ratio of 1TBS of Seasoning to 1/4 cup of Flour until you have enough to coat your Turkey Breast 2 times.


Next, mix one egg and a splash of Milk in another bowl

Then, take your Turkey and place in the dry mix and coat thoroughly

Shake off excess batter, then place in egg mixture

Once coated in the egg mixture, let excess drip off, then place Turkey back in to the dry batter for its last coating.


Now for the fun part. Drop it VERY carefully in to the hot oil (we cooked our Turkey at 350°) make sure not to let the oil over flow or it will be a BIG problem and can even cause a fire. Cook your Turkey to an internal temperature of 165°. Ours cooked for approximately 15 minutes. A Turkey in 15 minutes, can you believe it??


Once it has cooked, let it sit in the basket to drain, or place on a few paper towels on top of a plate. Let your meat rest for a few minutes before slicing and serving. Tell me this doesn't look phenomenal?

THEN- serve with your favorite Thanksgiving or any time sides. Be sure to make your plate look like what I call a "man plate". The Holidays are not the time for portion control!! 


So good even Bentley was begging for it!

Special thanks to Van for doing all of the dirty work, dinner was great babe!

Hope everyone gives it a shot and loves it at much as we did.!

-Megan


Monday, November 26, 2012

Finished is Better Than Perfect


Welcome to my Blog! I am Megan, I am a girlfriend, student, professional, friend, daughter, and so on. I like food, fashion, decorating, crafts...the list goes on. I have a boyfriend, Van, my partner in crime. I also have two four legged fur children, Bentley and Nova. They are the most spoiled rotten dogs known to mankind, and I will grace you with their presence on the regular. You have to love them, or we can't be friends. This blog will scratch the surface of recipes I have tried, successes and failures alike! Crafts and projects, because I have to show and tell someone other than my poor boyfriend. He is a good sport, but the looks I get from him when power tools may be involved are almost too much to bear. Essentially, I created this blog to share the ins and outs of me, in hopes that someone, somewhere, will appreciate it!

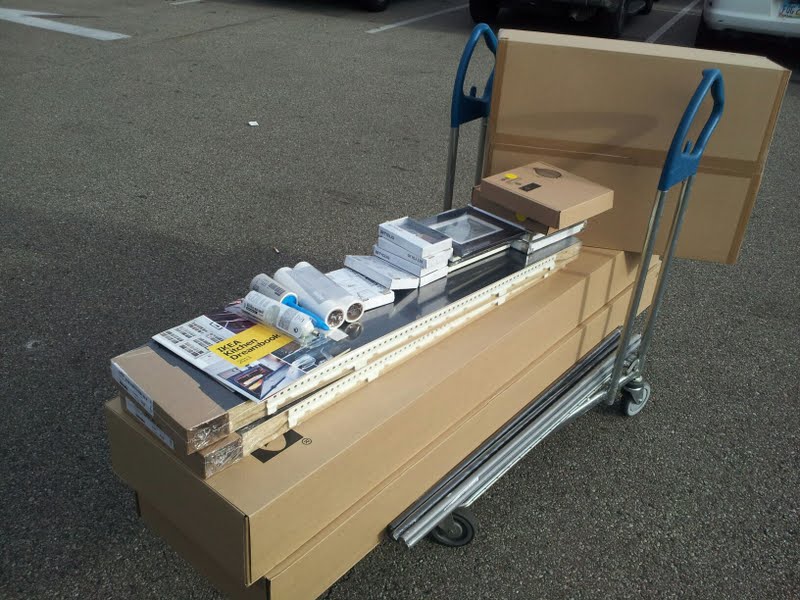
I will start you off with a day in the life of ME! After living in our apartment for oh, only 3 months, my boyfriend and I have decided to give ourselves the gift of "decorating our apartment" for Christmas. First thing on the list involves a trip to...... IKEA!!


Got a lot of loot!


Project Number One. Let's hang floating shelves....except floating shelves don't look like this....

This looks like an awning, and since we aren't expecting rain in our living room any time soon my new shelves that I was SOOO excited about have to find a new home. It's not like I drove 4 hours back and forth to Ikea JUST to get the shelves. Such is life!


-Megan